Window Cling Printing
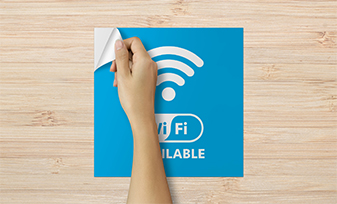
- Easy to apply, reposition, remove & reuse
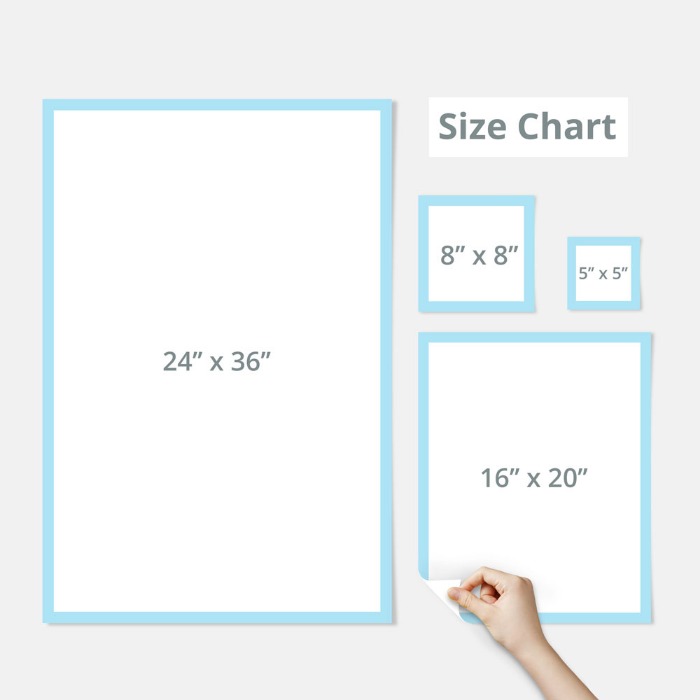
- Seven size options for all kinds of glass sizes
- Print your order in 1 business day
Window Cling Printing: Your Brand Through The Looking Glass
Make the most of valuable window space with window cling printing. Advertise with custom window clings on storefront windows or other visible surfaces. Versatile prints easily adhere to glass through micro-suction. You do away with messy glue that leaves an unsightly residue. Window clings are popular with retail stores and salons but have also found use as a fundraising tool on car windows.
Make It Look Frosty or Clear As Day
Two basic types of window clings are available. Both are abrasion and fade-resistant and can easily be repositioned without leaving a sticky residue. This makes them ideal for temporary advertisements.
- White Static Cling - Your artwork is printed on a white base surface. Designs are more vivid and easily readable from afar. These window decals work best for ads that need clear-cut text or pricing.
- Clear Static Cling - Your artwork is printed on a transparent base surface. Designs have see-through elements that appear as if they are part of the glass. These window stickers are perfect for logo or branding accents.
To See or Not to See, That is the Question
Decide how transparent your custom window cling design will look. White ink will be applied to areas of your design that you want to be more pronounced. What’s left will be transparent or see-through.
- Make Only the Background Transparent - Make text and images easier to distinguish with the application of white ink underneath your artwork. The background will be transparent.
- Make White Areas on File Print Clear - Make all text, images, and background in white transparent. Other design elements will have white ink underneath and show their corresponding color.
- Make Everything Transparent - Make your entire window cling transparent. No white ink will be applied. Note that this is not ideal for window decals with relatively small text.
- Follow File Transparency Settings - We will follow your design and print it as is. Pick this option if you have your file set up with the correct transparency and HPT-White layers.
Need help? We have Print Geeks ready to lend you a helping hand. Call 800-844-0599 from Monday to Friday between the hours of 7am and 11pm ET, Saturday and Sunday 9am to 8pm ET.
Going From Miniscule to Massive
Take full advantage of all glass surfaces available to you. Print window clings of different sizes for a wide variety of uses.
- 3" x 3" - Table mirrors and small windows
- 5" x 5" - To-go counter windows and comfort room mirrors
- 8" x 8" - Glass door refrigerators and freezers
- 16" x 20" - Popular size for storefront windows and glass doors
- 18" x 24" - Another widely used size for storefronts
- 20" x 30" - Changing room windows, sliding glass doors, and glass walls
- 24" x 36" - Larger and wider glass installations
Important note: All sizes are in inches.
Can’t find the size you want? Get your custom quote here.
From the Outside Looking In and Vice Versa
To Apply in Front of the Window
- Back of your design sticks to the glass surface
- Window cling applied from the outside
- Perfect for tinted windows
- High visibility and readability
- Reusable
To Apply Behind Window
- Front of your design sticks to a glass surface
- Window cling applied from the inside
- Not suitable for tinted windows
- Protects window sticker from outdoor elements
- Not reusable
Note: Your window cling is only reusable when the non-printed side is applied to the glass.
It’s easy to make your own window cling design. Download our templates to help you account for bleeds, trims, and safe zones so your artwork isn’t cut in the wrong places. If you have any questions on how to print window clings, contact us and we’ll get right on it.
3 Easy Steps on How to Apply Window Clings

Step #1: Clean Away
Clean the glass surface thoroughly. Make sure there is no dust or any residual particles left so your static cling window film adheres properly.

Step #2: Peel
Start peeling off the backing at 2” from the top before peeling the rest off.

Step #3: Apply
Wet the glass using a mixture of warm water and dishwashing liquid. Apply your window cling to the glass surface.

Step #4: Clear Out
Use a squeegee to remove excess liquid or air bubbles. If a squeegee isn’t on hand, a credit card will do. Place the squeegee at the center of the cling, gently pushing outward to the edges.
Most Asked Questions About Window Cling Printing
Q: What is a window cling?
A: A window cling is a thin vinyl film that sticks to flat glass surfaces without the use of adhesives. It uses micro-suction so it is easy to apply, remove, and reuse without leaving any residue. Popular uses for window clings are as storefront logos and ads, vehicle window stickers, and mall sliding door and glass wall decorations.
Q: Do window clings go on the inside or outside of the window?
A: Window clings can go on either the inside or the outside of the window. Applying them on the inside protects them from weather and people trying to peel it off but the design is not as easy to see. Applying them on the outside makes the design more legible from a distance but hastens wear and tear.
Q: Can I change the position of my window cling once it’s applied?
A: Yes, you can. Peel away your window cling from the glass surface and reapply. Use the same process as described above. You can only reuse the window cling when the non-printed side is applied to the glass.
Q: Can I print window clings with custom shapes and sizes?
A: Yes. You can submit a custom quote here.
Q: Can I use my own templates to print window clings? Can I print window clings with custom shapes & sizes?
A: Yes. You can print your window clings using your template. Upload your artwork from a computer or drag and drop files directly on the website. You can also send files using Dropbox, a secure file hosting service where you can manage and store your files.
You can also download FREE templates from us. Click the ‘Layout Templates’ tab above.


.jpg)


.jpg)
